The Mending Basket: A Winter Routine for Kit That Earns Another Season
Winter is hard on clothing. Not in the obvious, dramatic way we like to talk about in bike shops — the snapped chain, the buckled wheel, the brake pad worn to the backing plate. Cycling kit tends to go the other way. It frays. It dulls. It develops a small hole near the pocket, a damp patch along a shoulder seam, a zip pull that feels slightly less trustworthy every time you tug it with cold fingers.
The tempting response is to buy another one. The better response, and the one that fits neatly alongside everything else we do in the workshop, is to treat mending as maintenance. Not a craft project. Not a personality trait. Just a small, repeatable routine that keeps decent kit in service for another season.
Build the basket before the first failure
A mending basket works because it removes friction. If the needle is in a drawer upstairs and the patch is in a cupboard under the stairs, the hole will sit there until the garment has moved on to becoming a workshop rag. Keep the basics together, somewhere warm and well lit, and the job becomes a ten-minute interruption rather than an evening's administration.
Mine lives in an old tin that once held biscuits. Inside: a couple of hand-sewing needles, polyester thread in black and navy, a small ball of merino sock yarn, a thimble, sharp scissors, a seam ripper, a few squares of repair tape, a spare zip pull or two, hook-and-loop squares, and a tube of seam sealant. Nothing fancy. Nothing that needs a specialist supplier. Most of it came from a charity shop, a hardware shop and the bottom of a saddlebag.
Add a clean cloth and a small bottle of gentle detergent. Add good light. A head torch is surprisingly useful when you are trying to see the inside of a jersey pocket at six in the evening in November. The basket is not about hoarding supplies. It is about making the first step easy enough that you actually take it.
Fix one: merino and the small hole
Merino is brilliant in a British winter because it keeps working when it is damp, does not get clammy in the way some synthetics can, and feels good against the skin on a long, grey ride. It is also soft enough to develop small holes without much warning. A pinprick near a pocket. A thin patch at the elbow. A tiny tear where a label used to be.
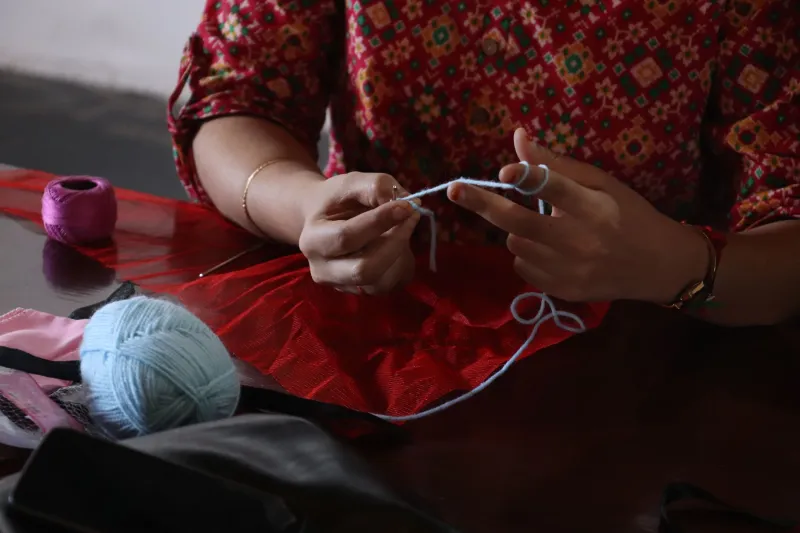
Catch these early. Turn the garment inside out and look at the hole in daylight if you can. Thread a needle with matching yarn — not cotton, which will rot and shrink differently, and not ordinary sewing thread if the fabric is thin. Anchor the yarn a centimetre or so away from the hole with a couple of small stitches. Then work across the gap in loose parallel lines, like a tiny fence, before weaving back through them at right angles. Do not pull tight. The darn should sit flat, with a little give, so the fabric can still stretch when you put it on.
Finish by working the yarn back into the solid fabric and trimming the end. No knot. Knots create hard lumps that rub under a jersey or a jacket. Wash the garment as normal, but check the darn first. If it feels stiff or puckered, unpick it and try again with a lighter touch. A visible darn is not a failure. It is a repair with a history, and it will often outlast the fabric around it.
Fix two: waterproof shells and the damp patch
Waterproof clothing is where frugality and wet-weather realism meet. A good shell is expensive, and most of the time it fails at the seams, the cuffs or the seat panel long before the membrane gives up. Small abrasions and pinpricks let water through in a way that feels mysterious until you hold the jacket up to a window and spot the tiny dark spot.
Clean the area first. A bit of grit under a patch is a guarantee that the patch will lift. Let the garment dry completely, then apply a proper repair patch — the stick-on fabric type sold for outdoor kit is ideal — to the inside where possible, or the outside if the damage is in a high-wear spot and you want the extra abrasion resistance. Press it firmly for longer than feels necessary. Warm it gently with your hand, not an iron. If the seam tape has lifted, a thin bead of seam sealant and a night hanging over a radiator will do more than another layer of proofing spray.
Test it under a tap before you trust it on a commute. If water beads and runs, good. If it darkens and spreads, dry it and try again. A repaired shell is not a guarantee of a dry ride, but it is usually enough to keep the worst of a British lane out of your baselayer.
Fix three: zips and hook-and-loop
Zips and hook-and-loop fastenings are the small moving parts of cycling clothing, and they fail in small, predictable ways. A zip that splits behind the slider can often be rescued by squeezing the slider gently with pliers — a tiny adjustment, not a heroic one. If the pull has snapped, a short loop of cord or a small zip pull replaces it without touching the teeth. If the tape itself has torn away from the garment, that is a bigger job, but a patch behind the tape and a few careful stitches can buy a season.
Hook-and-loop — the proper name for Velcro-style fastenings — clogs with lint, mud and biscuit crumbs. Clean the hook side with a comb or a stiff brush and it will often grip again. If it has genuinely worn smooth, replace the hook strip rather than the whole garment. A metre of sew-on hook-and-loop costs very little and sorts out cuffs, pocket flaps and strap guides. Sew it on with polyester thread and a couple of passes at each end, because that is where it will peel first.
Know when a garment is finished
Mending is not the same as refusing to let go. A jacket with a delaminated membrane, a seam that has pulled through the fabric, or a bib short whose pad has gone flat and whose fabric has worn thin at the crotch is not a repair project. It is finished. The same goes for anything that has become a safety issue: a torn strap, a zip that will not stay closed on a descent, a reflective panel that has peeled away from a commute jacket.
When a garment is done, retire it honestly. Cut it into workshop rags. Keep the good zip pull. Salvage the cord. Then move on. The point of a mending basket is not to create a museum of worn-out kit. It is to keep the useful things useful for as long as that makes sense.
Make it a shared habit
Mending is easier when you do not have to remember how. Local repair cafés, community bike workshops and the growing number of mending sessions attached to libraries and church halls are ideal places to take a jersey with a hole in it and a vague plan. Take the basket. Ask questions. Watch someone else thread a needle. The skills are not difficult, but they are much easier to learn when someone shows you once and you can copy them.
That is the workshop wisdom of it. A bike stays on the road because someone notices the small things early and deals with them while they are still small. Clothing is no different. A ten-minute fix on a dark Tuesday in November will not make the headlines, but it will keep a good jersey out of the bin and on your back for another winter of wet lanes and slow, steady miles.